サイトのSSL化を行う。 旧EC2で作ってきたWordPressデータの中身はSSL対応済(ジャンプ先はhttps~、になっている、等)なので、LightSailの対応のみ、行う。
HTTPS追加
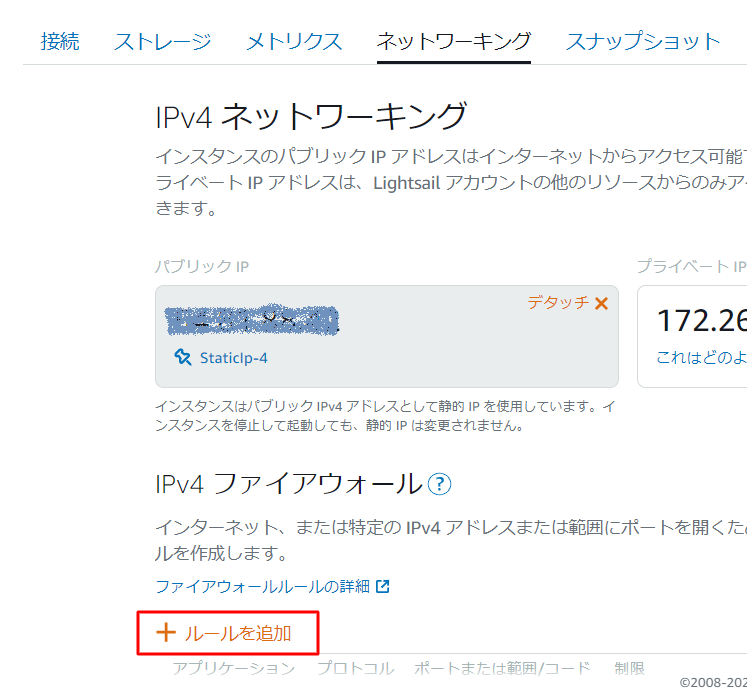
LightSailの管理画面から、ネットワーキング → ルールを追加、を選択。 HTTPSを追加。


mod_sslとcertbotのインストール
mod_sslのインストール
yum install -y mod_ssl
cd /etc/pki/tls/certs
ls
epelをyum対象へ追加
wget -r –no-parent -A ‘epel-release-.rpm’ http://dl.fedoraproject.org/pub/epel/7/x86_64/Packages/e/ rpm -Uvh dl.fedoraproject.org/pub/epel/7/x86_64/Packages/e/epel-release-.rpm
yum-config-manager –enable epel*
yum repolist all
certbotのインストール
vi /etc/yum/pluginconf.d/priorities.conf
enabled = 0
yum install -y certbot python2-certbot-apache
途中で27/28あたりでKilledで止まってるように見えるが、続きの対応は進められる
Installing : policycoreutils-python-2.5-22.amzn2.x86_64 26/28
Installing : certbot-1.11.0-1.el7.noarch 27/28
Killed
SSL証明書の取得
Apache(httpd)を止めて、証明書を取得
service httpd stop
certbot certonly –standalone -d codecreare.com
Congratulations!
Your certificate and chain have been saved at:
/etc/letsencrypt/live/codecreare.com/fullchain.pem
Your key file has been saved at:
/etc/letsencrypt/live/codecreare.com/privkey.pem
証明書のパスをApache(httpd)へ設定
vi /etc/httpd/conf.d/ssl.conf
SSLCertificateFile /etc/letsencrypt/live/codecreare.com/fullchain.pem
SSLCertificateKeyFile /etc/letsencrypt/live/codecreare.com/privkey.pem
Apache再起動
systemctl restart httpd


コメント